In this post, I will share how to create Testimonial Slider (and testimonial carousel) in Squarespace websites.
Both solutions use Blog Posts to create Testimonial.
In this post
Free testimonial (easy to do)

1. Create Blog page
First, you need to create Blog page.
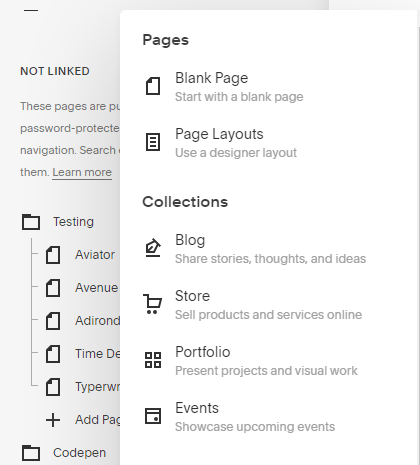
2. Add blog posts
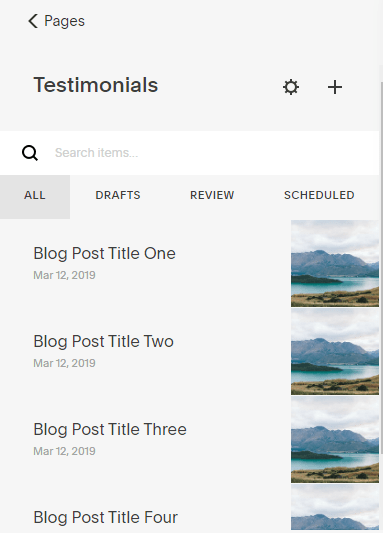
then add some blog posts
3. Insert Testimonial
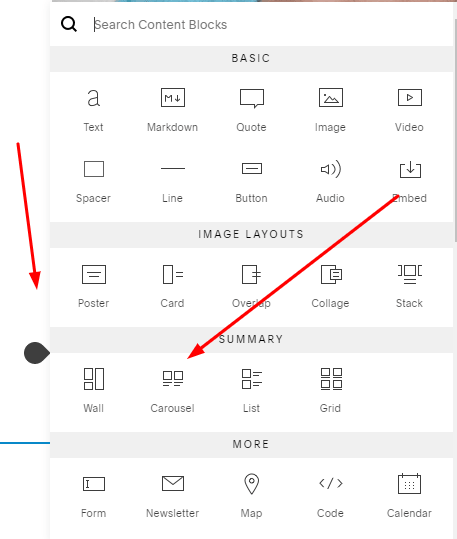
Next, edit the page where you want to create Testimonial.
and Insert Summary Carousel Block
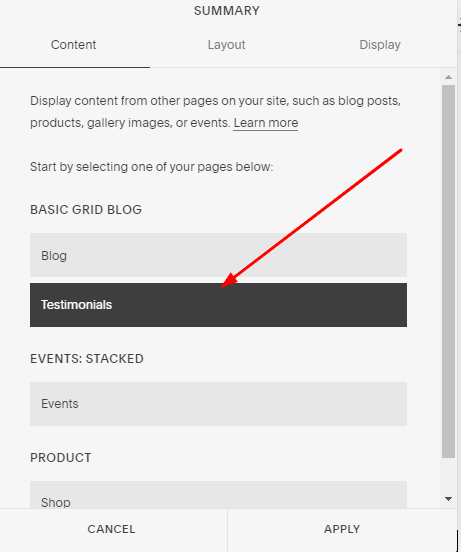
Select Blog page you just created above.
4. Customize
Customize your testimonial in Display & Layout tabs.
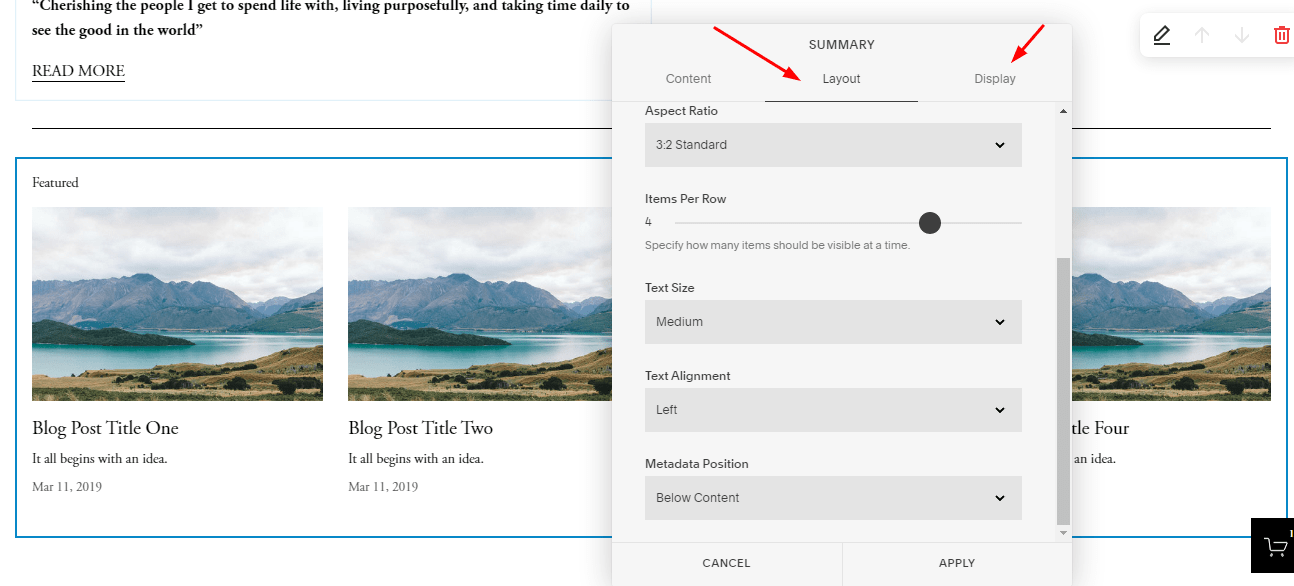
5. Some tricks
- Center Title/Description: Layout tab
- Remove “Feature” text: Content tab
- Remove Post Date: Design tab
- Set 3, 4, 5 items/row: Layout tab
Paid testimonial (easy to do, flexible customize)
1. Download Plugin
First you need to download this Testimonial plugin
Next, extract the plugin and open file: instructions.html – This is a very detailed tutorial file.
You can follow the instructions in that file, or you can follow the steps I wrote right away.
2. Upload Plugin
Upload these 2 files to your site
- plugin-testimonials-slider.css
- plugin-testimonials-slider.js
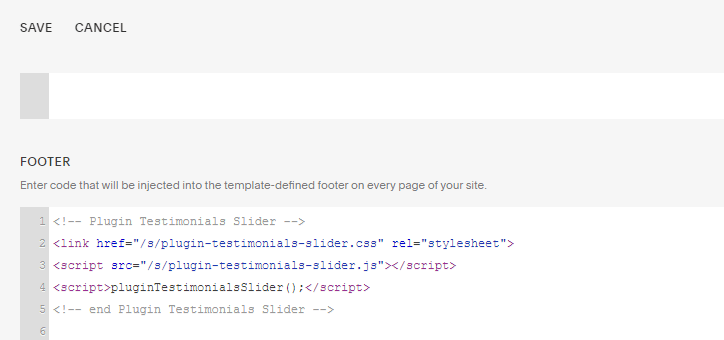
3. Declare core code
Paste these code to Home > Settings > Advanced > Code Injection > Footer
<!-- Plugin Testimonials Slider -->
<link href="/s/plugin-testimonials-slider.css" rel="stylesheet">
<script src="/s/plugin-testimonials-slider.js"></script>
<script>pluginTestimonialsSlider();</script>
<!-- end Plugin Testimonials Slider -->
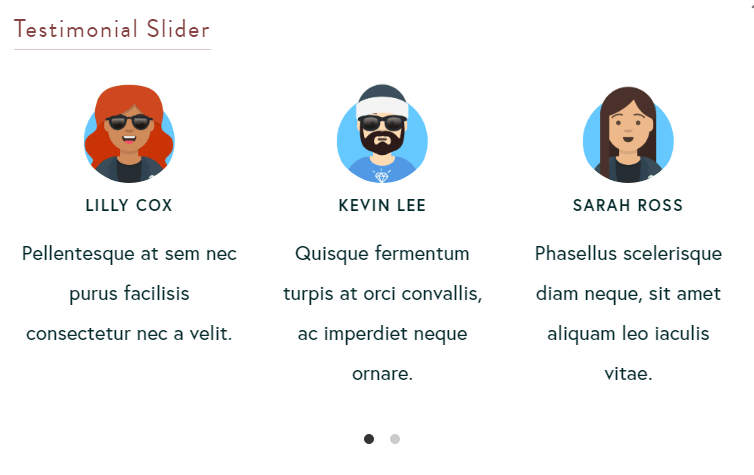
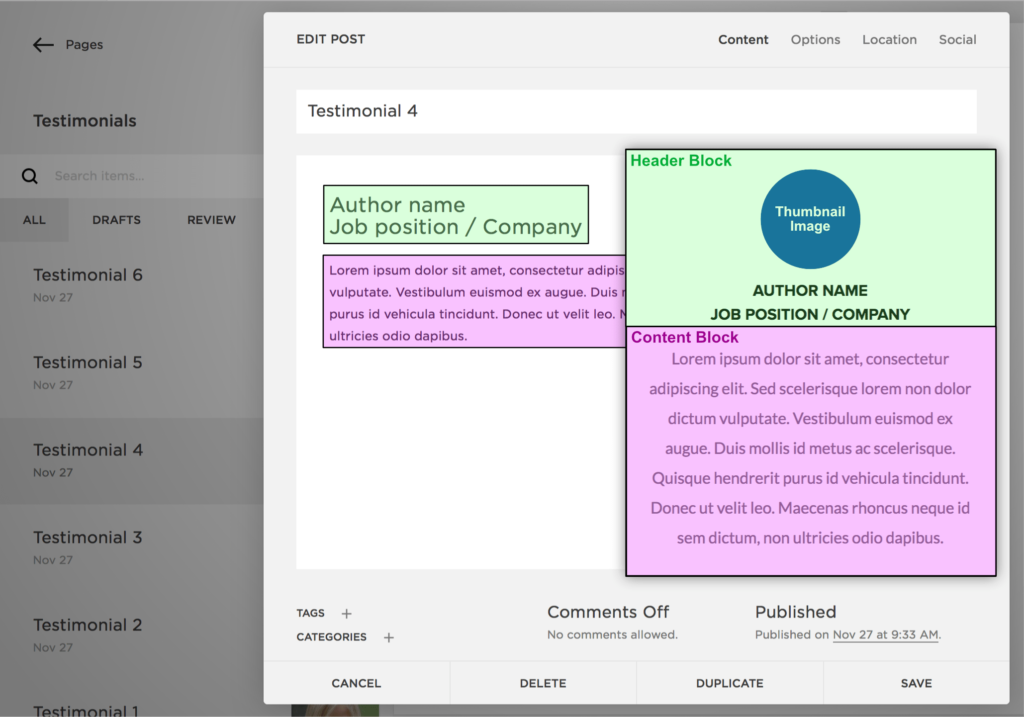
4. Add Testimonial Items
Create a Blog page with name: Testimonial
and add some blog posts
Notes:
- Testimonial Photos: Blog Thumbnail
- Testimonial Title: Heading (h1, h2 or h3)
- Testimonial Description: Content after heading
5. Find Testimonial Page Slug
Next, you need to find Testimonial Page Slug. See how to find Page URL Slug.
6. Add final code
Edit the page where you need to insert Testimonial > Insert Code Block > Paste this code
<div class="js-testimonials-slider" data-url="/testimonial"></div>
Replace /testimonial with Testimonial Page Slug (you found above step)
7. Customize Testimonial
Open instructions.html, scroll down to bottom.
You will see very detailed instructions for changing colors, spacing, number of items and many other settings for Testimonial Slider/Carousel.
Done!